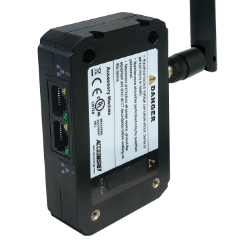
How to Configure Email for the Acuvim II & AXM-WEB2 Energy Meter
Proper energy meter configuration is essential to maximizing data accuracy and overall project success. At Accuenergy, we are committed to helping you set up your Acuvim II + AXM-WEB2 as quickly as possible so we’ve created a How To Video Series where we break down the setup process into easy-to-follow sections. Our short walkthroughs will teach you to efficiently navigate our web interface and get the most out of your metering devices.
Acuvim II + AXM-WEB2: How to Configure Email Using the Web Interface
The Acuvim II + AXM-WEB2 can automatically send metering, energy, harmonics, alarms, and other valuable data via email to up to three addresses on a custom time interval.
To complete these steps, you will need an Acuvim II meter with the AXM-WEB2 module powered up and connected to an internal network or the Internet plus the IP address of the device. In addition, you will need information on your SMTP server provider and other email configuration details. If you do not have access to this information, check with your IT department for assistance before proceeding.
Step 1
Enter the IP address of the AXM-WEB2 module in your web browser. This will take you to the Accuenergy Login screen which prompts you for an Access Level and Password. Select "Admin" for the Access Level and enter the case-sensitive password for your module (default password: admin). Click the "Sign In" button.
Step 2
Upon logging in, you will be taken to the Dashboard screen. Click on " Settings" in the upper right corner and then the "Communications" tab to the left.
Step 3
Under "Communications," select the “Email” tab to open the email configuration page.
Step 4
Select the "Enable" radio button under “SMTP Enable” to configure the SMTP settings.
Step 5
Complete the configuration fields under the Email tab.
- Click the "Start Time to Send Email" dropdown menu to choose a start date and time to send the emails. Click the crosshair icon on the bottom left of the calendar to automatically select the current local time.
- Next, enter the "SMTP Server" address that will be used to send the emails. For example, to use a Gmail server, set the SMTP server address to smtp.gmail.com.
- Enter the "SMTP Port" number for your SMTP server. The default SMTP port is 587.
- The sender's name should be entered into the "SMTP From" field.
- A helpful email subject line can be entered into the "SMTP Subject" field. This subject will be applied to all the emails sent from the Acuvim II meter.
- Next, determine whether your SMTP server requires authentication. If it does not, select the "Off" radio button under “Authentication.”
- If you have chosen to leave authentication "On," the next fields are "SMTP Username" and "SMTP Password." Enter the username and password for authentication.
- Choose the setting for "TLS/SSL" by choosing the appropriate radio button.
- Next, there are three "SMTP To Address" fields where valid recipient email addresses can be entered. An address must be entered in the first field, but the other two are optional.
- In the "Enable Periodic Email Reporting" box, select a time interval for how often the emails should be sent. The range is from 5 to 1440 minutes.
- Finally, select the parameters to include in each email by checking or unchecking the options as needed. Emails can also be triggered by alarm or SOE events. Check these boxes if you wish to receive these emails in real-time as events occur.
Step 6
Once the configuration details have been correctly entered, click the green "Save" button. For the settings to take effect, the module must be rebooted. You will be prompted to either “Reboot Now” or "Reboot Later." If “Reboot Later” is selected, the module must be rebooted from the "Management" page.
Step 7
If "Reboot Now" is selected, the module will begin the reboot process right away. Click the “OK” button to log out from the web interface.
Step 8
The reboot process takes 1-2 minutes. Once the process is complete, you may log back in to confirm the settings have taken effect. Follow the same login process as outlined in Step 1, the click Settings > Communication > Email to review the device settings.
Step 9
Scroll down to the "SMTP To Address 1" and click the "Test Address 1" button to confirm the successful configuration of the email settings. If the settings are correct, a popup window will state that the test was successful.
Step 10
If the test was successful, you may log out from the meter. This concludes the email configuration process.
For more information on configuring the Acuvim II + AXM-WEB2 module, visit our Video Guide page or Contact Us.


