
1. AXM-WEB Web Login Interface
To view the AXM-WEB web interface an Ethernet connection is needed.
-
Open an internet browser and type in the IP address of the meter in the browser search bar and hit the Enter key. The meter's web login page will display as followed:
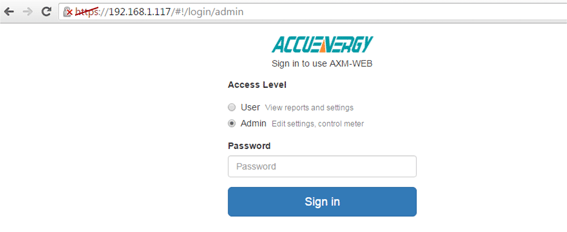
Figure 1
-
Login to the web page as 'Admin'. The default password is 'admin'.
Upon successfully logging in you will be redirected to the Dashboard where a brief report of data from the meter will display. The Dashboard will also display how long the AXM-WEB has been up and communicating.
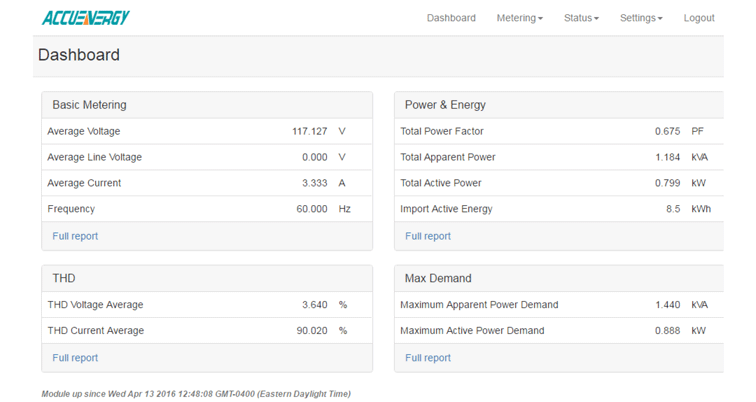
Figure 2


2. Navigate to HTTP/FTP Post Settings
-
Click on the 'Settings' tab and select 'Communications'.
-
Select 'HTTP/FTP Post'.
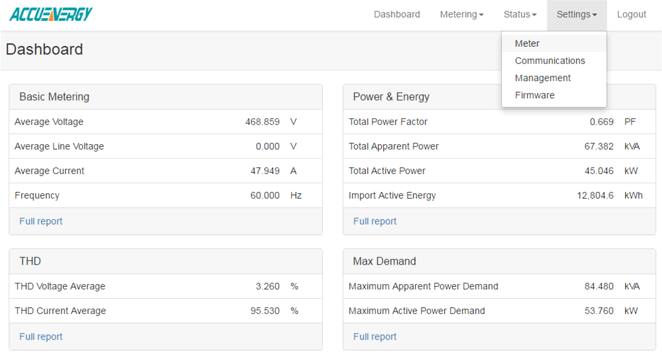
Figure 3
3. Configure HTTP/FTP Post Settings
-
You can configure the meter's HTTP/FTP Post function in this page to have the meter push data out at certain intervals of time. You can configure the meter to push to two different HTTP servers and one FTP server.
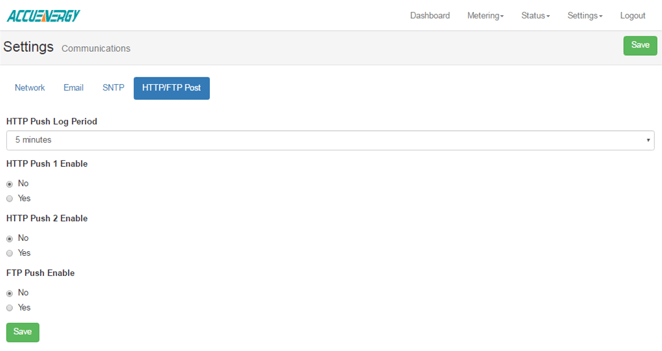
Figure 4
To use this functions the following settings need to be configured depending on which protocol will be used:
HTTP Push Log Period: Select how frequent the meter should push data to the server by selecting the interval of time from the drop down list. The most frequent the meter can push data is 5 min, the least frequent being 60 min.
HTTP Push 1 Enable: Select 'Yes' to enable and to further configure the HTTP Push 1 settings.
HTTP Push 1 Meter Upload Url: Enter the Url of the HTTP server that will receive the data from the meter.
HTTP Push 1 Port: Enter the port number for the server that will receive the data.
HTTP Push 1 Password: Enter the password to send data to the receiving server if applicable. Otherwise, leave blank.
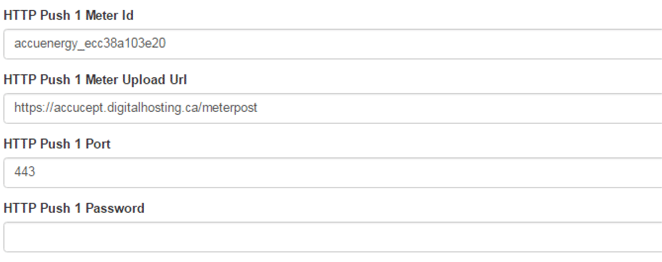
Figure 5
HTTP Push 2 Enable: Select 'Yes' to enable and to further configure the HTTP Push 2 settings.
HTTP Push 2 Meter Upload Url: Enter the Url of the HTTP server that will receive the data from the meter.
HTTP Push 2 Port: Enter the port number for the server that will receive the data.
HTTP Push 2 Password: Enter the password to send data to the receiving server if applicable. Otherwise, leave blank.
FTP Push Enable: Select 'Yes' to enable and further configure the FTP Push settings.
FTP Push Meter Upload Url: Enter the Url of the FTP server that will receive the data from the meter.
FTP Push Port: Enter the port number for the server that will receive the data.
FTP Push Username: Enter a valid username to send the data to the FTP server. An incorrect username could result in no data being received by the server.
FTP Push Password: Enter a valid password for the username above to send data to the receiving FTP server.
-
Click 'Save' after changing any settings. The AXM-WEB will also need to be rebooted from the 'Management' page.

Figure 6


