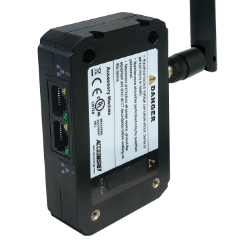
How to Configure CT Ratios for Acuvim II + AXM-WEB2 Energy Meter
Proper energy meter configuration is essential to maximizing data accuracy and overall project success. At Accuenergy, we are committed to helping you set up your Acuvim II + AXM-WEB2 as quickly as possible so we’ve created a How To Video Series where we break down the setup process into easy-to-follow sections. Our short walkthroughs will teach you to efficiently navigate our web interface and get the most out of your metering devices.
Acuvim II + AXM-WEB2: How to Configure CT Ratio Using the Web Interface
Prior to finalizing the installation of your power meter, it is important to confirm a few, basic meter configuration settings. One important setting that requires attention is the current transformer (CT) ratio. The current transformer settings for the Acuvim II meter and AXM-WEB2 communication module can be easily configured using the built-in web interface.
To complete these steps, you will need an Acuvim II meter with the AXM-WEB2 module powered up and connected to an internal network or the Internet plus the IP address of the device.
Step 1
Enter the IP address of the AXM-WEB2 module in your web browser. This will take you to the Accuenergy Login screen which prompts you for an Access Level and Password. Select “Admin” for the Access Level and enter the case-sensitive password for your module (default password: admin). Click the “Sign In” button.
Step 2
Upon logging in, you will be taken to the Dashboard screen. Click the " Settings" button in the upper-right corner of the page. The “Meter” tab will be highlighted, and the General device settings will be displayed.
Step 3
From the "Meter" tab, under "General" settings, scroll down to the "PT and CT Ratios" section.
Step 4
Note the fields labeled "CT1" and "CT2." CT1 is the Primary rating of the current transformer. CT2 is the secondary output of the current transformer.
CT1 (Rated Input Setting): Enter the primary rating of the current transformer that is being used with the meter. The range is from 1 to 50,000A. The default setting for CT1 is dependent on the current input type of the Acuvim II meter. The following table outlines the default CT1 values for different current input options:
| Acuvim II Current Input | Default CT1 Value |
|---|---|
| 1A | 1 |
| 5A | 5 |
| 3333mV | 1 |
| RCT (Rogowski) | 1000 |
| 80mA / 100mA / 200mA | 1 |
CT2 (Rated Output Setting): Select the rated output of the current transformer from the drop-down list. By default, this setting is already configured. If you are using a Rogowski coil or 333mV output current transformer, CT2 does not need to be configured.
It is important to note that CT2 only needs to be configured for CTs with 5A or mA rated outputs. Check the label on the CT to confirm the output rating. Choose the 5A setting for CTs with either a 5A or 1A output and choose mA for CTs with either 80mA, 100mA, or 200mA outputs.
For more information on current transformer labels and ratings, visit www.accuenergy.com/ct-info/.
Step 5
Once the current transformer settings are correct, click the green "Save" button at the bottom of the screen. For the settings to take effect, the module must be rebooted. You will be prompted to either "Reboot Now" or "Reboot Later." If “Reboot Later” is selected, the module must be rebooted from the "Management" tab ( Settings > Management).
Step 6
If "Reboot Now" is selected, the module will begin the reboot process right away. Click the "OK" button to log out from the web interface.
Step 7
The reboot process takes 1-2 minutes. Once the process is complete, you may log back in again to confirm the settings have taken effect. Follow the same login process outlined in Step 1, then click Settings > Meter > General to review the settings.
Step 8
After the settings are confirmed, you may log out again. This completes the process for adjusting the Current Transformer Ratio.
For more information on configuring the Acuvim II + AXM-WEB2 module, visit our Video Guide page or Contact Us.


